Introduction to AutoCAD Engr. ADEBAYO V. B. vicfema2k5@yahoo
49 Slides998.00 KB
Introduction to AutoCAD Engr. ADEBAYO V. B. [email protected]
The computer-aided drafting program, AutoCAD, is the most common such program. It has many, many aids to drawing construction plans and detail drawings. If changes are later made in the design, it is quick and easy to change the drawing in AutoCAD. a considerable amount of time and money as compared to traditional prototyping, as well as facilitating communication and testing. Drawing is the language of engineers
The AutoCAD or computer aided design machine has been a great help to engineers and also for several architectures that are finding it impossible to deal with drawings and plans of the project engineering work and the bring on the verge of perfection. Autocad or commonly known as computer aided design is a software application for writing and design 2D and 3D. He came on stage during the month of December nineteen hundred and eighty two.
AutoCAD is a software application for both 2D and 3D computer-aided design (CAD) and drafting — available since 1982 as a desktop application and since 2010 as a mobile web- and cloud-based app, currently marketed as Autocad 360. Developed and marketed by Autodesk, Inc., Autocad was first released in December 1982 — having been purchased a year prior in its original form by Autodesk founder John Walker. The software is currently marketed in its eighteenth generation.
OUTLINE Giving commands Object snap Zooming and panning Drawing 2D shapes Drawing 3D shapes Editing UCS Assignment Drawings are prepared in different sizes
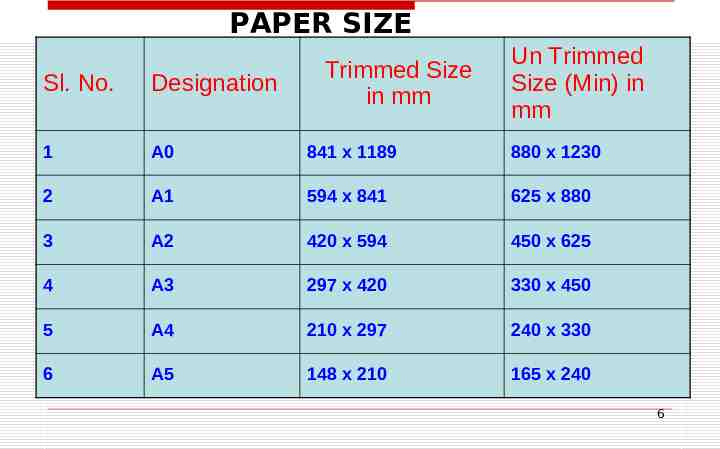
PAPER SIZE Trimmed Size in mm Un Trimmed Size (Min) in mm Sl. No. Designation 1 A0 841 x 1189 880 x 1230 2 A1 594 x 841 625 x 880 3 A2 420 x 594 450 x 625 4 A3 297 x 420 330 x 450 5 A4 210 x 297 240 x 330 6 A5 148 x 210 165 x 240 6
How do we give a command? Command line Toolbars (view/Toolbars) Drop-down menus You can pick any one(s) that you are comfortable with.
What is OSNAP? Osnap (Object Snap) settings make it easier to select a 2d object’s points Endpoint Midpoint Perpendicular Center İntersection Osnap will be active when AutoCAD is expecting you to pick a point on the working area Type osnap on your command window:
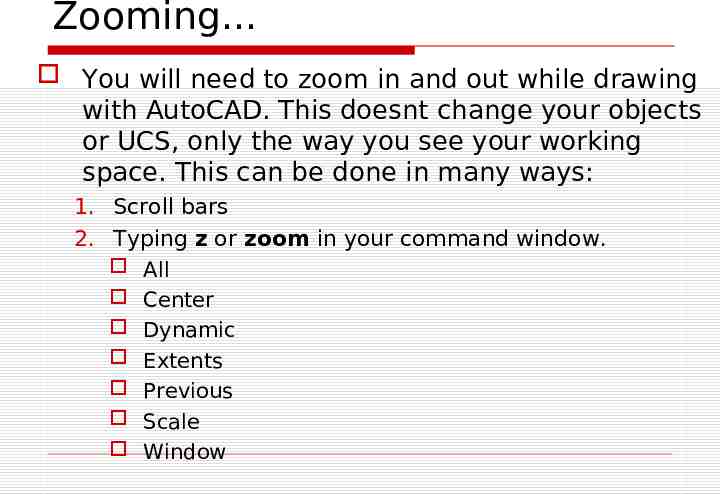
Zooming. You will need to zoom in and out while drawing with AutoCAD. This doesnt change your objects or UCS, only the way you see your working space. This can be done in many ways: 1. Scroll bars 2. Typing z or zoom in your command window. All Center Dynamic Extents Previous Scale Window
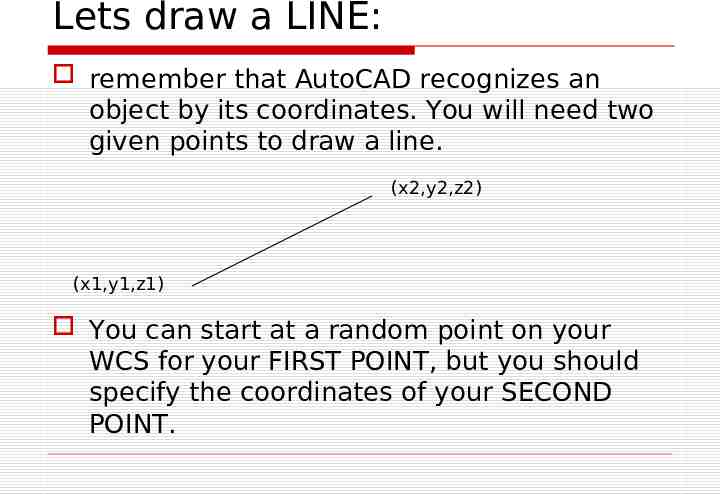
Lets draw a LINE: remember that AutoCAD recognizes an object by its coordinates. You will need two given points to draw a line. (x2,y2,z2) (x1,y1,z1) You can start at a random point on your WCS for your FIRST POINT, but you should specify the coordinates of your SECOND POINT.
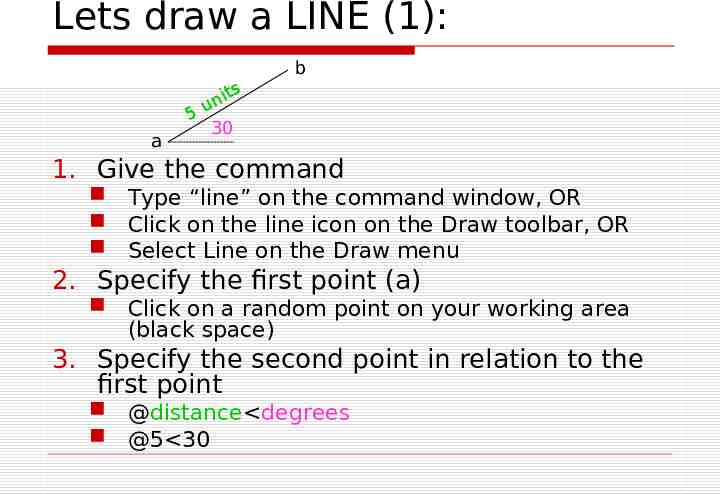
Lets draw a LINE (1): b a it n 5u 30 s 1. Give the command Type “line” on the command window, OR Click on the line icon on the Draw toolbar, OR Select Line on the Draw menu 2. Specify the first point (a) Click on a random point on your working area (black space) 3. Specify the second point in relation to the first point @distance degrees @5 30
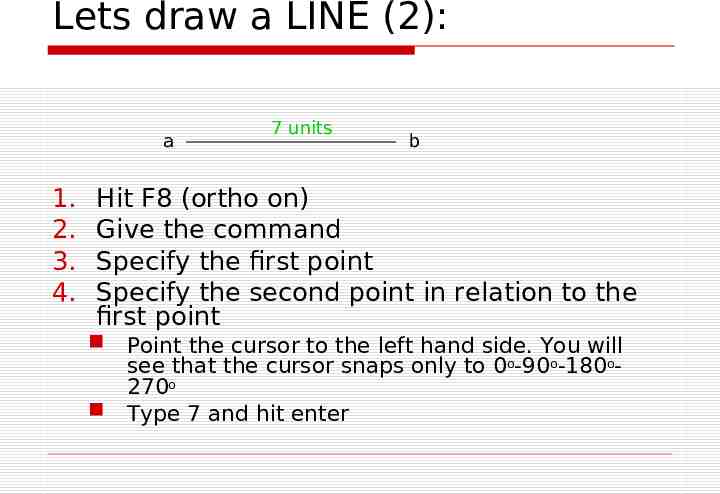
Lets draw a LINE (2): a 1. 2. 3. 4. 7 units b Hit F8 (ortho on) Give the command Specify the first point Specify the second point in relation to the first point Point the cursor to the left hand side. You will see that the cursor snaps only to 0o-90o-180o270o Type 7 and hit enter
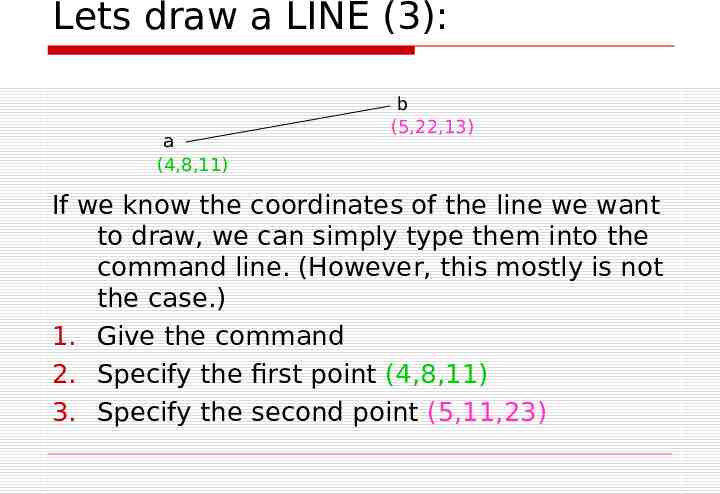
Lets draw a LINE (3): a (4,8,11) b (5,22,13) If we know the coordinates of the line we want to draw, we can simply type them into the command line. (However, this mostly is not the case.) 1. Give the command 2. Specify the first point (4,8,11) 3. Specify the second point (5,11,23)
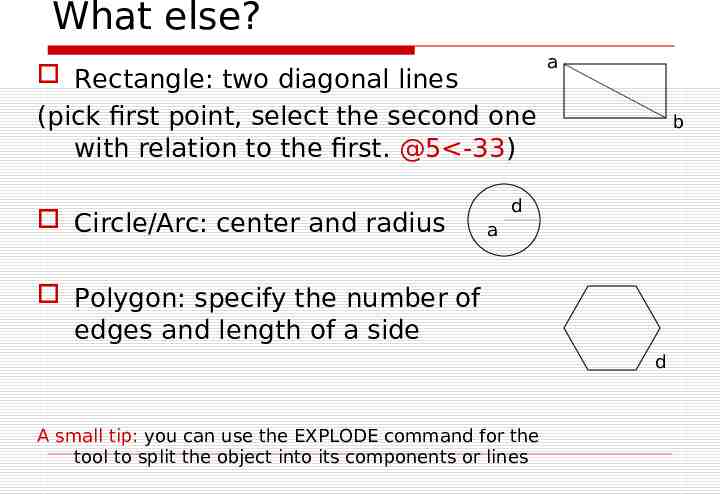
What else? Rectangle: two diagonal lines (pick first point, select the second one with relation to the first. @5 -33) Circle/Arc: center and radius a b d a Polygon: specify the number of edges and length of a side d A small tip: you can use the EXPLODE command for the tool to split the object into its components or lines
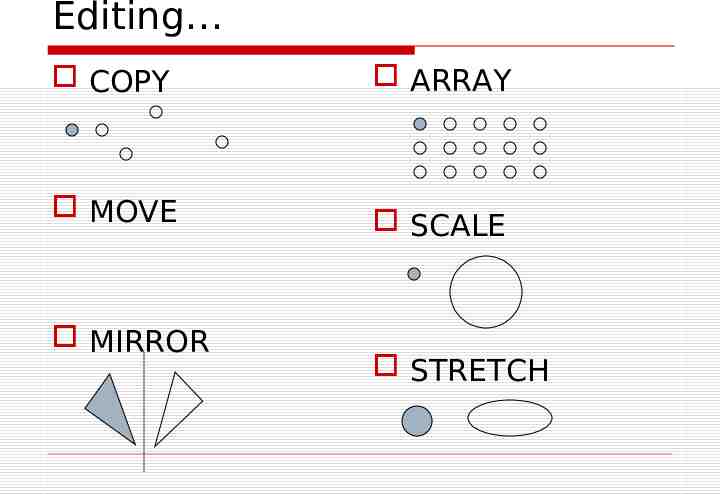
Editing COPY ARRAY MOVE SCALE MIRROR STRETCH
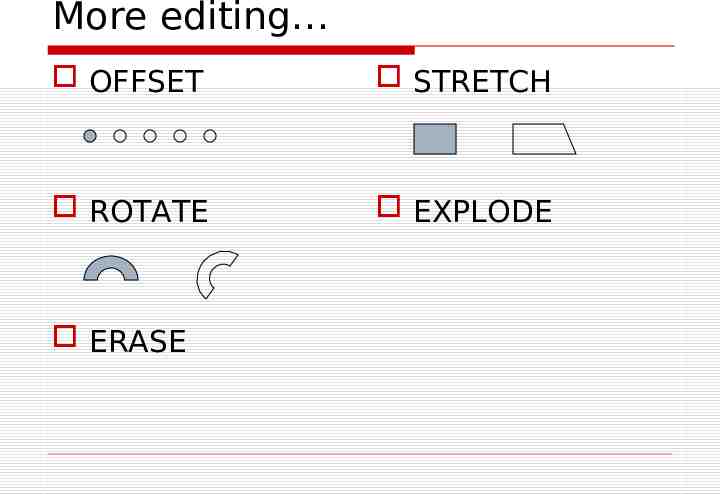
More editing OFFSET STRETCH ROTATE EXPLODE ERASE
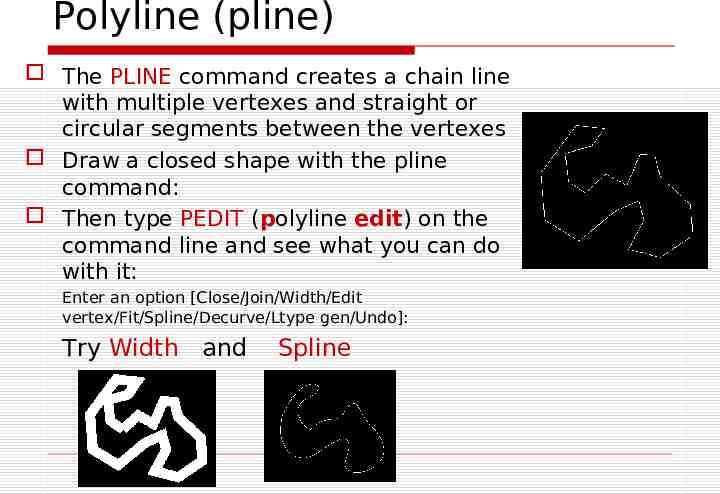
Polyline (pline) The PLINE command creates a chain line with multiple vertexes and straight or circular segments between the vertexes Draw a closed shape with the pline command: Then type PEDIT (polyline edit) on the command line and see what you can do with it: Enter an option [Close/Join/Width/Edit vertex/Fit/Spline/Decurve/Ltype gen/Undo]: Try Width and Spline
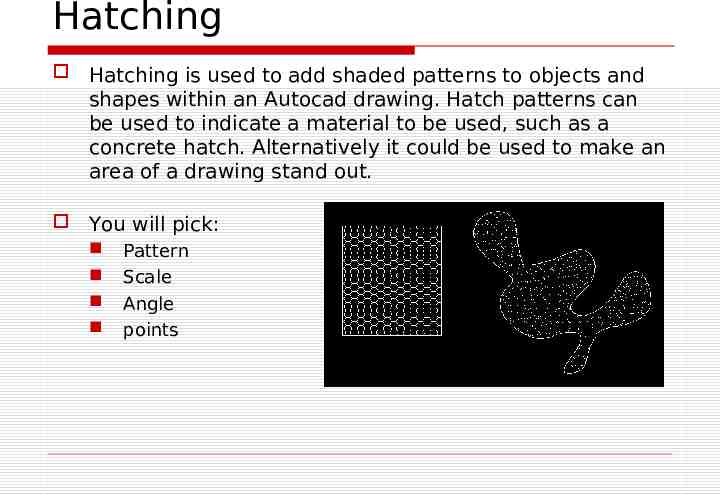
Hatching Hatching is used to add shaded patterns to objects and shapes within an Autocad drawing. Hatch patterns can be used to indicate a material to be used, such as a concrete hatch. Alternatively it could be used to make an area of a drawing stand out. You will pick: Pattern Scale Angle points
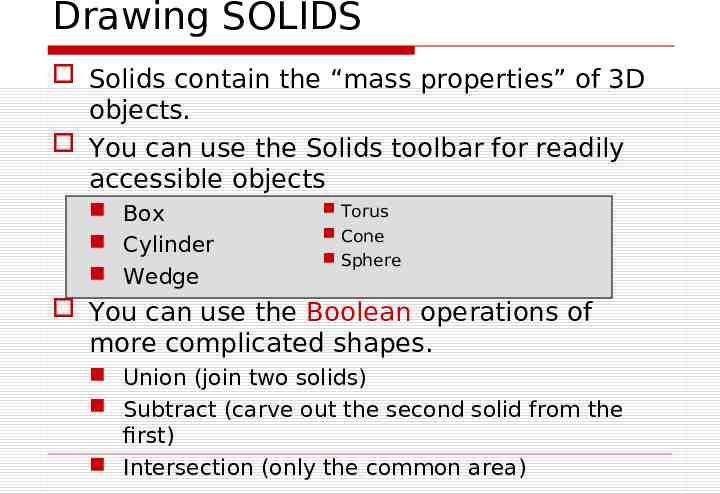
Drawing SOLIDS Solids contain the “mass properties” of 3D objects. You can use the Solids toolbar for readily accessible objects Box Cylinder Wedge Torus Cone Sphere You can use the Boolean operations of more complicated shapes. Union (join two solids) Subtract (carve out the second solid from the first) Intersection (only the common area)
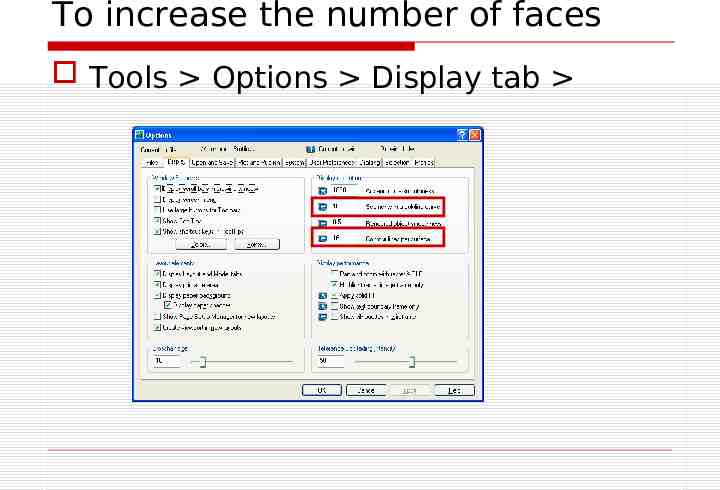
To increase the number of faces Tools Options Display tab
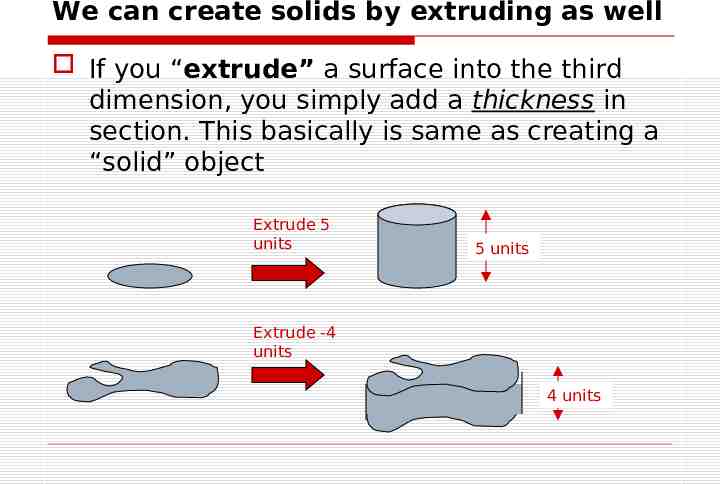
We can create solids by extruding as well If you “extrude” a surface into the third dimension, you simply add a thickness in section. This basically is same as creating a “solid” object Extrude 5 units 5 units Extrude -4 units 4 units
UCS and WCS The AutoCAD world is 3 dimensional. However, if we want to draw a 2d object, such as a plan or a section, we will use only 2 dimensions (x and y). WCS (world coordinate system) is the imaginary plane that is parallel to the ground. It is the default coordinate system. Modifications made to the World Coordinate System (WCS) result in a User Coordinate System (UCS). It is the plane that you work on. It enables the user to draw 3 dimensional objects. To create a new UCS, type ucs on the command window, then say New and specify 3 points on your new UCS plane.
Keys, Keys, Keys 64) 65) 66) 67) 68) 69) 70) 71) 72) 73) 74) Control R to cycle through all of your viewports Control A to select all the objects in your drawing Control to cycle through objects Tab to cycle through object snaps Navigate through layouts with Control PageUp and Control PageDown Hold down right mouse button to clear grips Shift for more than one hot grip Arrow up and down through commands Control Tab to cycle through open drawings OSNAP Tracking to find the center of a box M2P or MTP to find the midpoint between two points
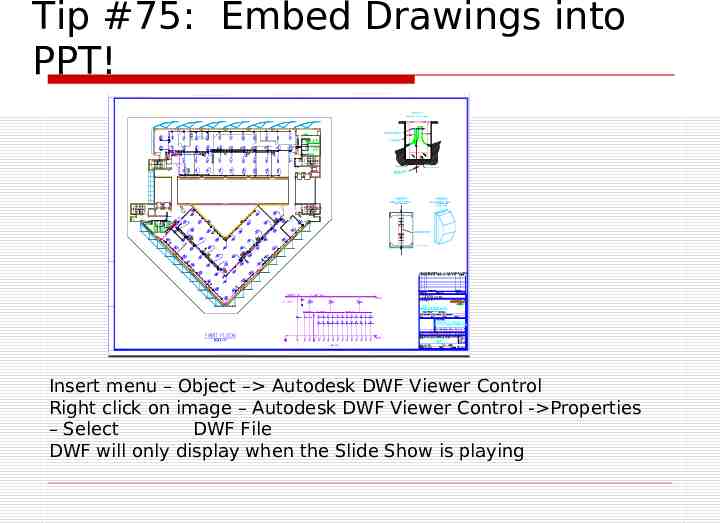
Tip #75: Embed Drawings into PPT! Insert menu – Object – Autodesk DWF Viewer Control Right click on image – Autodesk DWF Viewer Control - Properties – Select DWF File DWF will only display when the Slide Show is playing
PLANNING FOR CIVIL ENGINEERING CONSTRUCTION The first stage is preliminary stage which deals with the interpretation and location of site. Carry out the reconnaissance survey of the proposed site. Note some certain features down. Get the design brief from the owner / client for the project. Use the design brief to design the require building. Estimate all the costs and material quantity. The site plan is necessary to locate the site. Streams, rivers, rocks and other features around the site must be checked. Ask for the survey plan. After 50% of the payment by the owner of the project then you can start the building. After this, a design brief is done on the site. This will be carried out by the designer. Then, the materials needed for the construction is procured.
DESIGN BRIEF FOR A THREE BEDROOM BUNGALOW A master bedroom with wc, bath and dressing area that is very big Madam’s bedroom with a door to the master bedroom Kitchen and store 2 private lounges Dining room Study room Plat room A big verandah
Six drawings that can be produced are floor plan, section, elevation, roof plan, septic and soak away details, door and window schedule Site planning This is the process of creating scenery of land for various purposes. They may include car parks, swimming pool, welfares, building, gardens, sheds, stores. We have site plan, location plan and survey plan.
Working drawing It is 2 or 3 dimensional drawing showing all the works and duties that will be done from the beginning of the project to the completion stage. They are used on site during the phase of a building project. They include the plan, elevation, section, bending schedule.
They are drawings that have to be with engineer at all times during a construction project because engineers refers to these drawings to get measurements on site. This is called production drawing. It is used for conveying constructional information for the quantity surveyors and engineers. It is the ultimate thing unlike the presentation drawing.
Types of doors – Panel door, flush door, roller-shutter (folding) door, revolving door, swing door Stairs – straight flight staircase, half turn, quarter turn, spiral staircase, helical stair case Windows – framed windows, fixed windows, casement windows, sliding sash windows, pivoted sash, shutter window Roof – mono-pitch roof, double pitch roof, concrete flat roof, timber-flat roof
A staircase is a set of steps or flight leading from one floor to another. Materials for construction includes timber, stone and concrete (reinforced). Each step consists of horizontal portion or tread connected to a front part known as riser. The going of a step is the horizontal distance between the faces of two consecution risers. The rise of a step is the vertical distance between the tops of two consecutive treads.
Cantilever stair: - in these types of stair, there is a central reinforced concrete wall and each step cantilevers out of this wall. The various landings are designed as double cantilevers out of the central core wall. Spiral stair: - this is the most economical in terms of space utilization and cost. It consists of several cantilever steps jotting out like leaves from a central circular column. Each of the steps is designed as a simple cantilever and it is customary to taper the step, being wider at the free end.
Free standing or scissors stair: - similar to half-turn but with suspended halflanding. That is, the half-landing is supported by the two flights. This will need to design for torsion at the two ends of the stair. Helical stair: - it occupies less space than straight flight and the shape look a helix from floor to floor. It is always a straight flight but turning as it rises. The ends of the stair, torsion design must be made.
It has been found that, for comfortable usage, the best proportions of step are such that:Going 2 x Rise 580mm to 600mm. The protecting structure at the sides of the flight is referred to as balustrade and the vertical members of the balustrade are called balustrade while the horizontal or slant members are handrails. An optimum handrail height above the line of nosing of the stair is 840mm.
Page set up for AUTOCAD Drawing Z enter S enter N enter Choose your scale 1:100 P enter
Drawings encompass the architectural, civil, structural, and mechanical professions, and they are the means of conveying diagrammatic detailed aspects of the design components of a structure. Architectural drawings convey the aesthetic and functional aspects of the project and include the fire-rated classification of the structure, occupancy, exiting requirements, and conformance to code of conduct.
Elevations: These are a pictorial view of each façade of the building indicating windows, doors, etc. Building sections: A detailed sectional view through the building is taken usually in the project north-south and east-west direction. Sections and details: These are a largerscale dimensional detailed presentation of pertinent construction components and their interface connections with other materials.
Civil engineering drawings indicate site and project locations, vehicle accessibility, topography, site drainage, and possibly landscape requirements, although this aspect may be performed by a licensed landscape architect rather than the project architect. Structural Drawings indicate the design loads and applicable building code criteria and define the structural framing systems and their supports and foundations.
These drawings will contain the following: Elevations: These show the configuration of perimeter walls, shear walls, sizes of trusses, or vertical bracing systems, indicating forces in the members together with end moments. Sections and typical details: These are drawn to a larger scale and dimensioned, indicating detailed interfaces with the surrounding materials or components.
General notes: These indicate the design loading schedule which includes weights of materials; live, wind, and seismic loads; applicable codes; material designations; and instructions to the general contractor.
Mechanical Drawings. Mechanical drawings designate the heating, ventilating, and air-conditioning (HVAC) systems; electrical distribution requirements; fire and security systems; sprinklers and the necessary plumbing requirements. These drawings generally contain the ductwork sizes and locations and designate required openings in the structure for their paths.
Flowcharts and riser diagrams are produced for electric conduit runs and plumbing lines including sprinkler-piping systems. Drawings are prepared for the mechanical equipment rooms indicating the selected equipment, the operating weights of the machinery, and weights of heavy piping which are detailed to be hung or floor-mounted.
You have been appointed as the Civil Engineer by Mr. Lawrence to construct a building. Highlight ten out of your copious responsibilities from the beginning to the end of the project that will ensure timely completion of the project. Assuming that the client has not appointed any architect. (6 marks)
Differentiate between any FOUR Architectural and Civil Engineering Drawing Working and Presentation Drawings BEME and BOQ Sections and Elevations Septic tank and Soak away (8 marks)
Write short but informative notes on any THREE AutoCAD and its command Types of Staircase Types of Doors and types of windows Types of Paper size Site Planning (6 marks)
Thank you for listening
Reading and interpreting multi-storey building (up to 2 storey) for the purpose of construction
Elevations: These are a pictorial view of each façade of the building indicating windows, doors, etc. Building sections: A detailed sectional view through the building is taken usually in the project north-south and east-west direction. Sections and details: These are a larger-scale dimensional detailed presentation of pertinent construction components and their interface connections with other materials.
Civil Engineering Drawings. Civil engineering drawings indicate site and project locations, vehicle accessibility, topography, site drainage, and possibly landscape requirements, although this aspect may be performed by a licensed landscape architect rather than the project architect. Structural Drawings indicate the design loads and applicable building code criteria and define the structural framing systems and their supports and foundations.

